


How to Check for Water in Your Lower Unit
Introduction
Knowing how to check for water in your lower unit is essential for every boat owner. Water intrusion can cause severe damage to gears and bearings, leading to expensive repairs or even engine failure. Regularly checking the lower unit protects your investment and keeps your boat running smoothly.
In this detailed guide, we’ll walk you through the process of checking for water in your lower unit, share maintenance best practices, and offer troubleshooting tips. Use code WELCOME5 to get 5% OFF instantly at allboatsupplies.com!
What Is the Lower Unit?
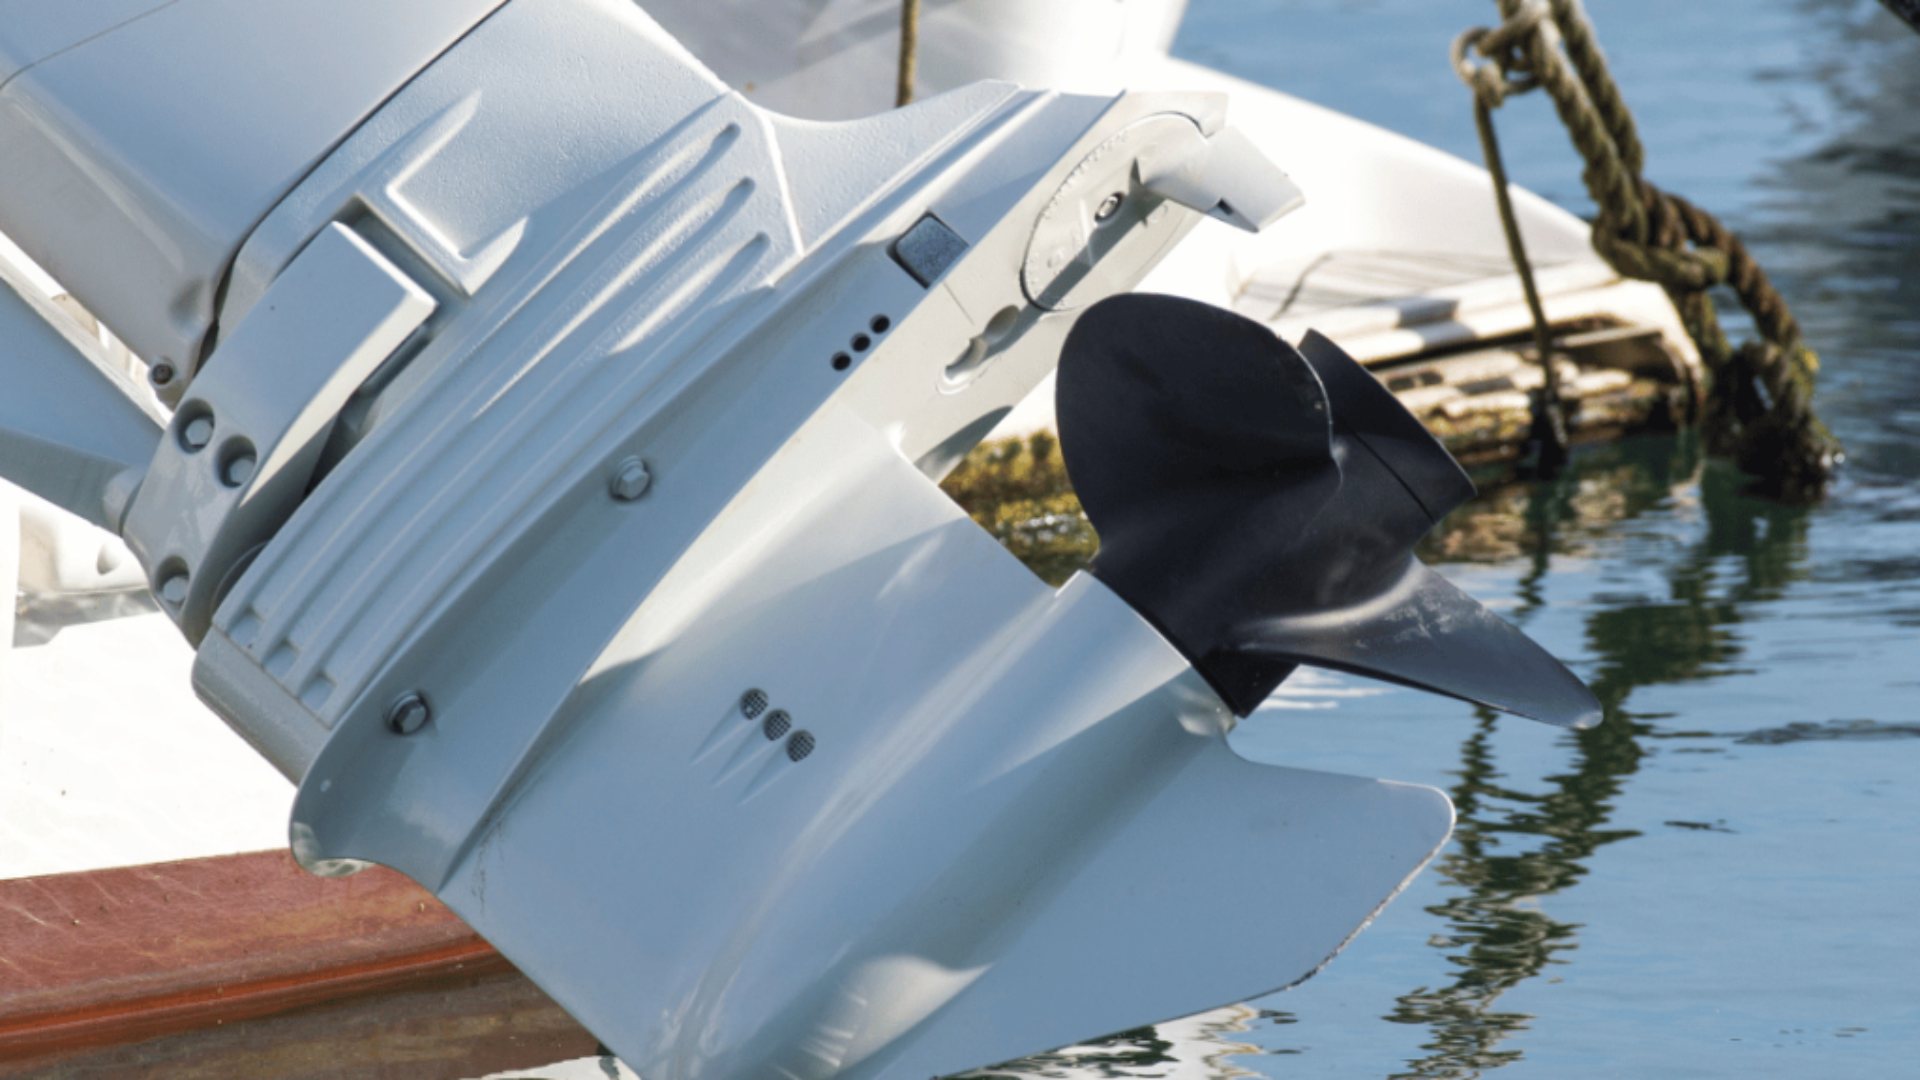
The lower unit, also known as the gearcase or outdrive, is the part of your boat’s outboard or sterndrive engine submerged underwater. It houses gears, the driveshaft, and the propeller shaft, transferring power from the engine to the propeller.
Because the lower unit operates underwater, it requires a sealed system filled with lubricating gear oil to prevent water intrusion. Water entering this sealed area can cause rust, corrosion, and gear damage.
Compatibility / Fitment Guide
Lower units vary by engine model, manufacturer, and horsepower rating. When checking for water or performing maintenance, ensure you use parts and lubricants compatible with your specific lower unit model.
- Refer to your engine manual for lower unit specifications and oil type.
- Use OEM or high-quality aftermarket gear oil rated for marine lower units.
- Verify seals and gaskets fit your lower unit to prevent leaks.
- Order replacement parts from trusted suppliers to ensure proper fitment.
Browse compatible lower unit parts and gear oils at allboatsupplies.com for peace of mind.
Step-by-Step Instructions: How to Check for Water in Your Lower Unit
Checking for water in your lower unit is straightforward and should be done regularly, especially after boating in rough or saltwater conditions. Follow these steps:
- Prepare Your Tools: Gather a drain pan, screwdriver or Allen wrench, clean rag, and fresh marine gear oil.
- Locate the Drain and Vent Plugs: The lower unit has two plugs—one at the bottom (drain) and one near the top (vent).
- Remove the Vent Plug First: This allows air to enter and oil to flow out smoothly.
- Place the Drain Pan Below the Drain Plug: Position it to catch oil and any water that drains out.
- Remove the Drain Plug: Let the oil fully drain into the pan.
- Inspect the Drained Oil: Look for any water contamination, which appears milky, cloudy, or emulsified.
- Check for Metal Shavings: Metal debris in the oil can indicate gear damage alongside water intrusion.
- Flush and Refill: If water is present, flush the lower unit with fresh oil and replace seals. Refill with fresh, recommended gear oil.
- Reinstall Drain and Vent Plugs: Torque plugs to manufacturer specifications to ensure a proper seal.
- Test the Boat: Run the engine and check for leaks or unusual noises.
This process helps you check for water in your lower unit early to avoid costly repairs.
Maintenance & Care Best Practices
Prevent water intrusion by following these maintenance tips:
- Change your lower unit oil at least once per season or every 100 hours of use.
- Inspect drain and vent plug seals for wear or damage before each season.
- Use only recommended marine gear oil designed to protect against water contamination.
- Rinse your lower unit with fresh water after every saltwater use to reduce corrosion risk.
- Store your boat upright to prevent water from pooling in the gearcase.
Regular maintenance prevents damage and extends your lower unit’s lifespan.
Use code WELCOME5 to get 5% OFF instantly at allboatsupplies.com!
Cost Breakdown (OEM vs Aftermarket)
Costs related to checking and maintaining your lower unit vary based on parts and labor:
- Gear Oil: Marine-grade gear oil costs $15–$40 per quart, depending on brand and quantity.
- Seals and Gaskets: OEM lower unit seals range from $20–$80. Aftermarket options may be cheaper but vary in quality.
- Labor: Professional lower unit service runs $100–$300 depending on complexity and location.
- Replacement Lower Units: For severe damage, lower units cost from $500 to over $2,000 depending on engine type and model.
DIY checking and maintenance reduce labor costs significantly. For quality parts and gear oils, visit allboatsupplies.com.
Troubleshooting & Common Issues
Common issues signaling water in the lower unit include:
- Milky or foamy gear oil – A sure sign of water contamination.
- Gear slipping or grinding noises – Damaged gears caused by water corrosion.
- Visible oil leaks – Faulty seals letting water in and oil out.
- Overheating lower unit – Lack of proper lubrication due to contaminated oil.
If you detect any of these signs during your check, address them promptly by flushing, replacing seals, or consulting a marine mechanic.
Expert Tips & Buyer Advice
- Always change your lower unit oil after every 100 hours or annually, whichever comes first.
- Invest in quality OEM seals and marine gear oils for reliable water protection.
- Keep a maintenance log documenting lower unit oil changes and inspections.
- After heavy use in saltwater, check the lower unit more frequently to prevent hidden damage.
- Explore all marine engine parts and gear oils at allboatsupplies.com to ensure top performance.
Comparison with Alternatives
Some boaters consider alternative methods like synthetic oils or water-detecting sensors. While synthetic marine gear oils offer enhanced lubrication and water resistance, they do not replace the need for routine water checks.
Water-detecting additives can signal contamination but cannot replace physical inspection. Manual oil draining and visual inspection remain the most reliable ways to check for water in your lower unit.
Learn more about : How to Grease the Driveshaft Splines Properly
Call-to-Action: Where to Buy
Ready to maintain your lower unit properly? Shop premium marine gear oils, seals, and lower unit parts at allboatsupplies.com today. Use code WELCOME5 to get 5% OFF instantly!


