How to Replace a Prop Shaft on a Yamaha Lower Unit
Introduction
If you’re experiencing vibrations, propeller issues, or gear malfunctions, it might be time to replace the prop shaft on your Yamaha lower unit. This is a critical maintenance task that ensures your outboard motor performs at its best. Whether you’re a seasoned DIYer or a curious boat owner, understanding how to replace your Yamaha prop shaft can save you hundreds in repair costs and keep your time on the water trouble-free.
This step-by-step guide will walk you through everything from removing your old shaft to installing the new one properly — while ensuring you don’t damage seals, gears, or other vital components.
Overview / What Is a Yamaha Prop Shaft?
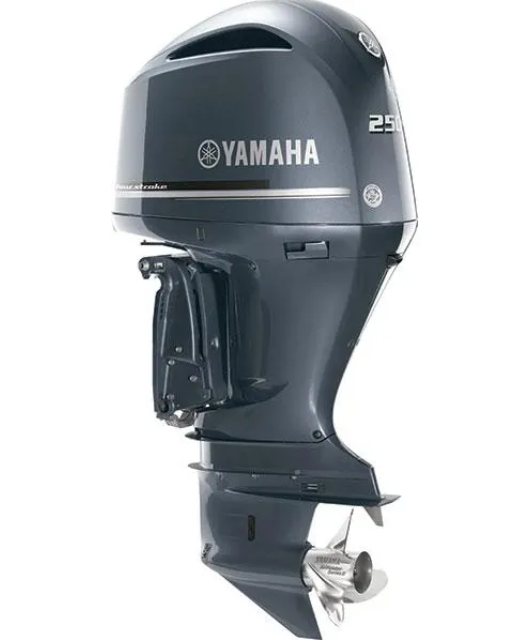
The propeller shaft is a central component within your Yamaha outboard lower unit. It’s responsible for transmitting rotational energy from the gearcase to your propeller, which in turn propels your boat forward or backward. Over time, this shaft can bend, wear out, or corrode, especially in saltwater conditions or due to impacts with submerged objects.
Replacing the prop shaft on a Yamaha lower unit isn’t as intimidating as it sounds — provided you have the right tools, a clean workspace, and patience. With proper technique and attention to detail, you can restore full performance and extend the life of your outboard motor.
When Should You Replace the Prop Shaft?
Knowing when to replace a Yamaha prop shaft is key. Here are common signs you should watch for:
- Visible bending or warping of the shaft
- Unusual vibrations or wobbling at high speeds
- Propeller does not spin correctly
- Oil leakage or water intrusion in the lower unit
- Grinding noises from the gearcase
Ignoring these issues could lead to gearbox damage or complete lower unit failure. Regular inspection and preventive maintenance can help catch shaft damage early.
Tools and Materials Needed
Before you start the replacement, make sure you have the following tools and materials:
- Prop shaft removal tool (Yamaha-specific recommended)
- Gear lube drain pan
- Snap ring pliers
- Torque wrench
- Seal puller and installer
- New OEM or aftermarket prop shaft
- Gearcase seal kit
- Marine grease and gear oil
Using OEM Yamaha parts or high-quality aftermarket equivalents is critical to ensuring longevity and performance.
Step-by-Step: How to Replace Prop Shaft on Yamaha Lower Unit
1. Remove the Lower Unit
Start by disconnecting the battery and safely lifting your outboard. Drain the gear oil by removing the lower and upper drain screws. Then, unbolt the lower unit from the midsection. You may need to shift the motor into forward gear to allow separation.
2. Disassemble the Gearcase
Remove the propeller and any washers or spacers. Use snap ring pliers to extract the bearing carrier. Once removed, slide the old prop shaft out of the housing. Inspect the internal gears for damage.
3. Install New Shaft
Grease the new shaft and carefully insert it into the gearcase. Ensure alignment with the gears. Reinstall the bearing carrier and any associated seals. Torque all bolts to manufacturer specifications.
4. Pressure Test and Refill Oil
Conduct a pressure test on the unit to ensure no leaks. Refill with fresh Yamaha marine gear oil. Reattach the lower unit to the midsection and reconnect the battery. Finally, test the shift operation and perform a sea trial.
Common Mistakes When Replacing a Prop Shaft
Even experienced boat owners can make errors when attempting to replace a prop shaft. Here are the most common:
- Forgetting to pressure test the unit before refilling oil
- Reusing old seals or O-rings
- Improper torque on the bearing carrier bolts
- Not aligning gears properly, causing damage during reassembly
Always reference Yamaha’s factory service manual for your specific model to avoid costly mistakes.
Maintenance Tips
Proper maintenance is essential to extend the life of your new Yamaha prop shaft. Follow these tips:
- Flush your engine after every use in saltwater
- Grease the shaft splines regularly
- Inspect propeller for dings or bends that can affect shaft alignment
- Check gear oil for metal shavings or milky appearance monthly
Preventive maintenance saves money and extends the life of your lower unit components.
Expert Advice and Pro Recommendations
Marine mechanics recommend using OEM Yamaha or quality aftermarket parts to avoid tolerance issues that can lead to premature failure. Tools like Yamaha’s specialty prop shaft tool can also make removal and installation smoother and safer.
If you’re unsure about the process or lack experience, it’s worth investing in professional help. A certified Yamaha tech can usually perform the replacement within 2–3 hours with the proper tools and training.
Detailed FAQ Section
How long does it take to replace a Yamaha prop shaft?
The time it takes to replace a prop shaft on a Yamaha lower unit varies depending on experience and equipment. For DIYers, the job typically takes 3–5 hours including disassembly, shaft replacement, reassembly, and testing. A professional mechanic with the right tools may complete the task in under 2 hours. The most time-consuming parts are removing the bearing carrier and performing the leak-down/pressure test afterward.
What’s the cost to replace a Yamaha prop shaft?
The cost to replace a Yamaha prop shaft includes the price of the part itself and any related seals or labor. A new prop shaft ranges from $200–$400 for aftermarket options and $400–$700 for genuine OEM parts. A full seal kit adds about $60–$120. If hiring a professional, labor can range from $300 to $600 depending on your location. DIY replacement can save money but requires the right tools and some mechanical skill.
Can I reuse old seals when replacing the prop shaft?
It is highly discouraged to reuse old seals when replacing a prop shaft. Seals deform and compress during use and removal, and reusing them may lead to oil leaks or water intrusion. Always install a fresh gearcase seal kit when replacing the shaft. This ensures the integrity of the gearcase and helps avoid future repairs or performance issues.
Do I need special tools to replace a Yamaha prop shaft?
Yes, replacing a Yamaha prop shaft safely and correctly often requires a few special tools. The most common are a Yamaha-specific prop shaft removal tool, a bearing carrier puller, a seal installer, and a torque wrench. While generic alternatives can sometimes work, using the correct tools prevents damage to delicate components and ensures proper installation, especially on newer or high-horsepower models.
Is it okay to use aftermarket Yamaha prop shafts?
Aftermarket Yamaha prop shafts can be a reliable and affordable alternative to OEM parts — if you choose a trusted brand. Quality aftermarket manufacturers like SEI Marine match OEM tolerances closely, ensuring compatibility and durability. However, be cautious of cheap or unverified parts as they may lack the precision needed for high-performance engines and may not last as long. Always read reviews and confirm compatibility before purchase.
Special Offer
WELCOME5 – Get 5% off storewide at allboatsupplies.com
And upto 10% additional off on all lower units
-
Yamaha Aftermarket Lower Unit Replaces 75-100HP (2 & 4 Stroke) – 2.0/2.3 Gear Ratios, 18 Spline, 20/25″ Shafts – SEI-90-404
-
Yamaha Aftermarket Lower Unit Replaces 115-130HP 4-Stroke – Fits 20/25″ Shafts – SEI-90-405
-
Yamaha 90° Aftermarket Lower Unit Replaces 150-200HP (2 & 4 Stroke) – Fits 20/25″ Shafts – SEI-90-416
-
Yamaha 150–200HP Lower Unit 4-Stroke – 20/25″ Shaft – F150/F175/F200 Series (2004–2024) – New/Remanufactured – YA-G4-06
Conclusion
Learning how to replace a prop shaft on a Yamaha lower unit is a valuable skill for boaters and DIY marine enthusiasts. With the right tools, knowledge, and patience, you can restore your outboard’s performance and save on costly repair bills. Always take safety precautions, follow the factory manual, and use high-quality replacement parts for the best results. For all your Yamaha lower unit parts and accessories, visit allboatsupplies.com.
Read More
For more helpful marine maintenance guides, check out our article on How to Remove Yamaha Lower Unit Without Damaging Gaskets.
