DIY Pressure Testing Yamaha Lower Units Safe & Simple
Introduction
If you’re a boat owner, especially with a Yamaha outboard, knowing how to perform DIY pressure testing Yamaha lower units is crucial for maintaining optimal performance and longevity. A pressure test can identify hidden issues like seal leaks, which if left unchecked, can result in catastrophic engine damage. This guide walks you through a safe, simple, and effective process for testing your Yamaha lower unit at home.
In this blog, we’ll explain what a lower unit is, why pressure testing is essential, and give step-by-step instructions so you can do it confidently—even without professional help. Whether you’re troubleshooting water intrusion or preparing for seasonal maintenance, mastering this test is a valuable skill for any boater.
Overview / What Is DIY Pressure Testing Yamaha Lower Units
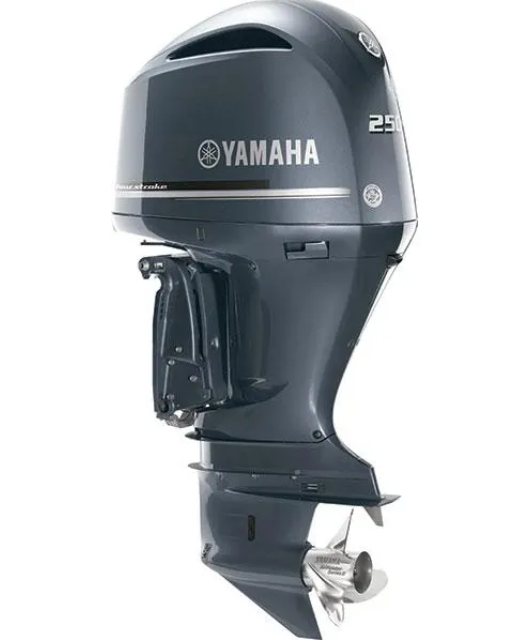
The lower unit, also known as the gearcase, is a critical component of your Yamaha outboard motor. It houses gears, bearings, seals, and the water pump that help translate engine power into propeller movement. Over time, seals can wear or fail, allowing water to seep into the unit. This can lead to corrosion, gear damage, and eventual engine failure.
DIY pressure testing Yamaha lower units involves applying air pressure into the gearcase to check for leaks. This preventive maintenance task is often overlooked, yet it’s one of the best ways to extend your outboard’s lifespan and avoid costly repairs.
Why Pressure Testing Your Lower Unit Matters
Pressure testing isn’t just for mechanics. Even DIY boaters can carry it out with basic tools and safety precautions. Here’s why it matters:
- Prevents costly repairs: Catching a leak early can save you hundreds or even thousands in repair costs.
- Protects internal components: Keeping water out protects gears, seals, and bearings from rust and damage.
- Ensures performance: A healthy lower unit maintains full thrust and optimal efficiency.
For seasonal boaters, performing this test before and after storage is essential. For frequent users, a monthly checkup may be wise depending on operating conditions.
How to Pressure Test a Yamaha Lower Unit (Step-by-Step)
Let’s get into the core of this guide—how to pressure test a Yamaha lower unit safely and simply. You’ll need:
- Lower unit pressure tester (or homemade version with a hand pump & gauge)
- Thread adapter (usually 3/8”-16 for Yamaha drain/fill screws)
- Soap-water solution (for leak detection)
- Gloves and safety goggles
Step 1: Prepare the Lower Unit
Remove the boat from water. Make sure the lower unit is clean and dry. Unscrew the drain and vent plugs, then remove the gear oil. Inspect the oil for signs of water intrusion (milky texture = water contamination).
Step 2: Attach the Pressure Tester
Thread your pressure tester into the drain hole. Tighten it securely but don’t overtighten. Attach the gauge and hand pump.
Step 3: Apply Pressure
Slowly pump air into the unit. DO NOT exceed 15 psi. Most Yamaha lower units should be tested at 6–12 psi. Hold the pressure for 5–10 minutes.
Step 4: Inspect for Leaks
Spray soapy water on key areas: prop shaft, shift shaft, driveshaft, and water pump housing. Watch for bubbles which indicate leaks. Note: some slow leaks may take several minutes to show up.
Step 5: Resolve and Retest
If a leak is found, replace the faulty seal or O-ring, then retest until no bubbles appear and pressure holds steady. If no leak is found and the pressure remains stable, your unit is sealed and good to go!
Common Pressure Testing Mistakes to Avoid
Even experienced DIYers make these errors:
- Overpressurizing: Exceeding 15 psi can damage seals.
- Testing when hot: Let the unit cool before testing to avoid false readings.
- Skipping leak checks: Always use a soap solution or submerge in water to verify leaks.
Being methodical pays off. Keep a record of test results to monitor unit health over time.
Maintenance Tips
Alongside DIY pressure testing Yamaha lower units, follow these maintenance practices:
- Change gear oil every 100 hours or at least once per season.
- Inspect seals and prop shaft every month if used frequently.
- Flush the engine after saltwater use to reduce corrosion risks.
- Use OEM or quality aftermarket parts to maintain integrity.
Routine maintenance prevents major breakdowns and keeps your Yamaha outboard running smoothly.
Expert Advice and Pro Recommendations
According to marine technicians and Yamaha-certified mechanics:
- Perform a pressure test after any prop strike, even minor ones.
- Replace both drain plug washers with every oil change.
- Don’t wait for symptoms like gear whine or milky oil—test preventively.
Yamaha lower units are reliable but require attentive care. Many seasoned boaters swear by semi-annual pressure tests to catch wear-and-tear before it escalates.
Detailed FAQ Section
How often should I pressure test my Yamaha lower unit?
It depends on how often and where you boat. For seasonal users, testing at the start and end of each season is ideal. If you’re boating in saltwater or harsh environments, consider testing every 2–3 months. Any time you notice performance changes or after a prop strike, a pressure test is recommended. Regular testing extends your gearcase’s life significantly.
What PSI is safe for testing Yamaha lower units?
Most Yamaha lower units should be tested between 6 and 12 psi. Going beyond 15 psi may compromise seals. Always follow your owner’s manual or consult a Yamaha technician. Maintaining the correct pressure ensures accurate results without damaging internal components.
Can I perform pressure testing without professional tools?
Yes. Many DIYers use a hand pump, a pressure gauge, and a threaded adapter to create a reliable test setup. While professional kits are more convenient, a homemade version works well if you’re careful. Just make sure connections are airtight and you don’t exceed the recommended pressure limits.
What are the signs my Yamaha lower unit has a leak?
Common signs include milky gear oil, water dripping from the prop shaft area, performance loss, or strange sounds from the lower unit. Pressure testing helps confirm the leak location so you can repair it before more serious damage occurs. It’s much more effective than guessing based on symptoms.
How much does it cost to repair a leaking Yamaha lower unit?
DIY repairs, such as replacing a seal or O-ring, may cost under $50 if you do it yourself. However, if water has already caused gear damage, professional repair or full lower unit replacement could run from $500 to $2,500. That’s why DIY pressure testing Yamaha lower units is a smart and affordable prevention strategy.
Special Offer
WELCOME5 – Get 5% off storewide at allboatsupplies.com
And up to 10% additional off on all lower units
-
Yamaha Aftermarket Lower Unit Replaces 75-100HP (2 & 4 Stroke) – 2.0/2.3 Gear Ratios, 18 Spline, 20/25″ Shafts – SEI-90-404
-
Yamaha Aftermarket Lower Unit Replaces 115-130HP 4-Stroke – Fits 20/25″ Shafts – SEI-90-405
-
Yamaha 90° Aftermarket Lower Unit Replaces 150-200HP (2 & 4 Stroke) – Fits 20/25″ Shafts – SEI-90-416
-
Yamaha 150–200HP Lower Unit 4-Stroke – 20/25″ Shaft – F150/F175/F200 Series (2004–2024) – New/Remanufactured – YA-G4-06
Conclusion
Learning DIY pressure testing Yamaha lower units is one of the smartest maintenance tasks you can perform as a boat owner. It’s affordable, straightforward, and can save you from expensive repairs. Whether you’re an occasional weekend boater or a seasoned saltwater angler, regular testing ensures your Yamaha lower unit stays sealed and efficient.
Stay proactive—test smart, stay safe, and keep your engine humming. For the best deals on replacement parts and lower units, check out AllBoatSupplies.com today!
Read More
For more helpful marine maintenance guides, check out our article on Cracked Yamaha Lower Unit Housing � Repair or Replace?.


