DIY Yamaha Lower Unit Skeg Guard Installation
Introduction
If you’re a boat owner who navigates shallow waters or deals with hidden debris, a Yamaha lower unit skeg guard installation can protect your propeller and lower unit from damage. This DIY guide walks you through how to safely and effectively install a skeg guard, helping you save on costly repairs and prolong the life of your outboard motor.
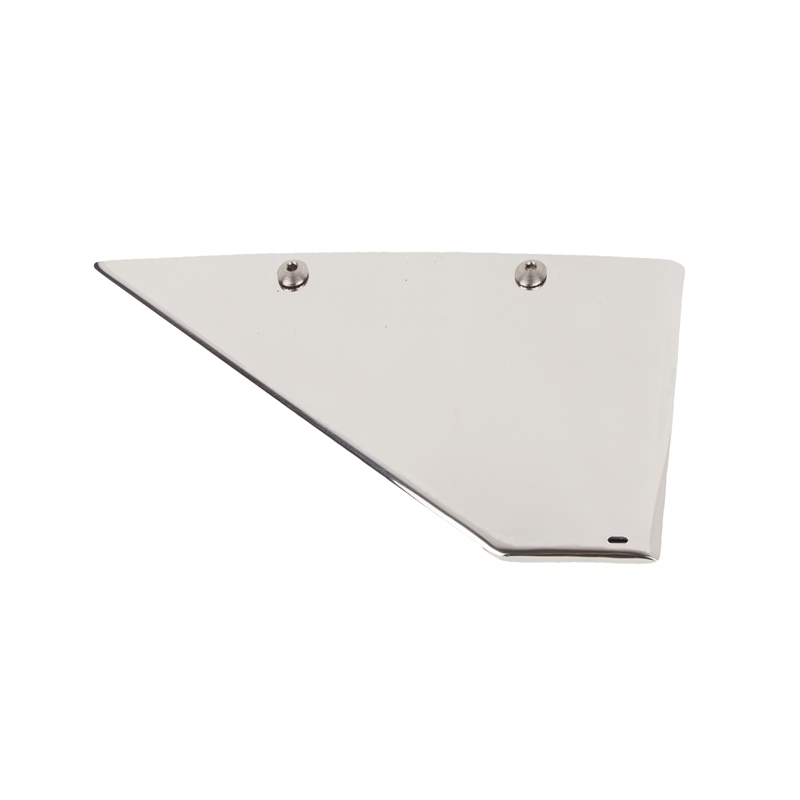
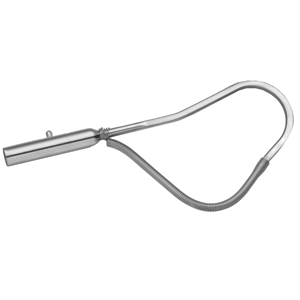
Skeg guards are stainless steel or aluminum shields designed to slide over a damaged or vulnerable skeg and bolt into place. Whether you’re looking to prevent wear or restore function, this article gives you everything you need to know about the Yamaha lower unit skeg guard installation process—tools, steps, tips, and more.
Overview / What Is a Yamaha Lower Unit Skeg Guard?
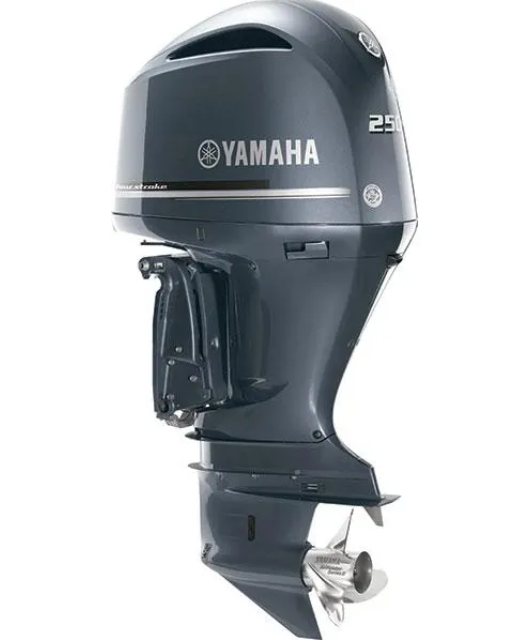
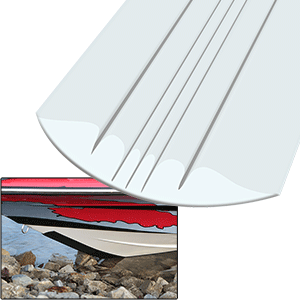
A skeg guard is a protective cover that fits over the skeg on the lower unit of your Yamaha outboard. The skeg itself is crucial—it protects the propeller and assists with steering. When damaged by rocks, trailer mishaps, or sandbars, your outboard’s performance can suffer.
The skeg guard acts as armor, absorbing impacts and shielding the original skeg. Popular materials include marine-grade stainless steel for strength and corrosion resistance. These guards are not only functional but also offer a sleek, polished look that complements your engine.
Why Install a Skeg Guard on Your Yamaha Lower Unit?
There are multiple reasons to install a skeg guard on your Yamaha outboard:
- Protection: Defends against accidental ground strikes and corrosion.
- Restoration: Covers up chips or damage, restoring skeg functionality.
- Performance: Maintains propeller balance and reduces cavitation.
- Aesthetics: Gives your motor a clean, upgraded appearance.
Installing a skeg guard is a popular solution among DIYers looking to maintain their Yamaha outboards without resorting to costly welding or lower unit replacement.
Tools & Materials Needed for Skeg Guard Installation
- Stainless steel skeg guard (compatible with your Yamaha model)
- Drill and drill bits (typically 1/4″)
- Measuring tape
- Marker or pencil
- Marine-grade adhesive (optional but recommended)
- Wrench or socket set
- Protective gloves and safety glasses
Before starting the Yamaha lower unit skeg guard installation, verify that your skeg isn’t severely bent or broken. Severe damage may require a professional inspection before guard placement.
Step-by-Step Guide: DIY Yamaha Lower Unit Skeg Guard Installation
Step 1: Prep the Skeg Surface
Use a clean rag to wipe down the skeg. Remove any dirt, algae, or paint flakes. If needed, lightly sand the area to improve adhesion and ensure a snug fit for the guard.
Step 2: Position the Skeg Guard
Slide the skeg guard over the skeg. Ensure it fits tightly and lines up evenly with the leading and trailing edges. Mark where the holes will be drilled.
Step 3: Drill Pilot Holes
Carefully drill the holes at your marked spots. Make sure you only drill through the skeg and not into the prop shaft or lower unit housing.
Step 4: Apply Adhesive (Optional)
To reinforce the hold and prevent water intrusion, apply a bead of marine adhesive inside the skeg guard before final placement.
Step 5: Bolt the Guard in Place
Insert the supplied bolts and secure them tightly with a wrench. Double-check alignment and ensure the guard doesn’t interfere with the propeller.
Step 6: Post-Installation Check
Spin the propeller by hand and ensure it moves freely. Wipe down any excess adhesive and confirm that the guard is stable and properly aligned.
Skeg Guard Cost and Durability
The average cost for a Yamaha-compatible skeg guard ranges from $75 to $150, depending on brand and material. Stainless steel options offer excellent corrosion resistance and are highly durable in both saltwater and freshwater environments.
Properly installed, a skeg guard can last the lifetime of your motor, offering long-term protection and avoiding hundreds of dollars in lower unit repairs.
Best Yamaha Skeg Guard Options Available
- Megaware SkegGuard for Yamaha – Made with 316 marine-grade stainless steel
- Gator Guard – Features a mirror-polished finish and double-bolt design
- Skeggard by Gator – Custom-fit models for Yamaha outboards from 75HP to 250HP
Always verify compatibility with your engine model before purchasing a guard.
Maintenance Tips
Once installed, skeg guards require minimal maintenance. Here’s how to keep them in top shape:
- Rinse After Use: Always rinse with fresh water after saltwater exposure to avoid salt buildup.
- Inspect Monthly: Check for signs of loosened bolts or corrosion.
- Reapply Adhesive: If adhesive was used, inspect seals and reapply as needed.
- Remove Marine Growth: Use a plastic scraper to gently remove barnacles or algae.
Regular inspections ensure that your Yamaha lower unit skeg guard installation continues to protect your engine season after season.
Expert Advice and Pro Recommendations
Marine professionals recommend installing skeg guards proactively rather than waiting for damage. A quality guard can prevent thousands in repair costs by shielding the lower unit from hidden dangers underwater.
When selecting a guard, choose marine-grade stainless steel and ensure it comes with a double-bolt system for maximum retention. Avoid generic models—go with Yamaha-specific designs for the best fit and performance.
Detailed FAQ Section
Can I install a skeg guard on a damaged skeg?
Yes, you can install a skeg guard over a moderately damaged or chipped skeg, as long as the main structure is intact. The guard is designed to restore the shape and functionality of a skeg without welding or replacement. If the skeg is bent or broken beyond the mounting area, you should consult a marine mechanic for further inspection. Severe damage may lead to alignment issues that affect steering or cause propeller imbalance. Always ensure the guard fits snugly and is properly aligned before final installation.
How long does it take to install a skeg guard?
The typical Yamaha lower unit skeg guard installation can be completed in about 30–45 minutes. This includes surface preparation, test fitting, drilling, and final mounting. If you’re using adhesive, account for curing time as well. With basic tools and the correct part, even novice DIYers can handle the process confidently. Taking your time during alignment and marking will help ensure a secure fit that lasts for years.
Will installing a skeg guard affect my Yamaha outboard performance?
No, a properly installed skeg guard will not affect your Yamaha’s performance. In fact, it can improve tracking and protect the propeller from unexpected hits. Guards are engineered with hydrodynamics in mind and designed to match the contours of the original skeg. However, make sure there’s no interference with the prop or exhaust ports. After installation, always perform a dry run by spinning the propeller and checking for vibration or obstruction.
How do I choose the right skeg guard for my Yamaha outboard?
To choose the right skeg guard, you need your Yamaha’s HP rating, year, and lower unit model. Most brands provide compatibility charts or search tools. Look for marine-grade stainless steel models with double-bolt locking mechanisms for secure installation. Some popular brands even offer specific guards for 2-stroke or 4-stroke engines. Avoid universal-fit options that may not align properly or offer full protection. Consult the manufacturer’s website or reach out to a marine supply store for confirmation before ordering.
Can I remove the skeg guard later if needed?
Yes, skeg guards can be removed if necessary, but the process involves unscrewing the bolts and possibly removing marine adhesive. If adhesive was used, use a heat gun to soften the bond and carefully pry off the guard. Be cautious not to damage the skeg during removal. Once removed, inspect the skeg for any wear or corrosion hidden beneath. Some boaters remove the guard seasonally for deep cleaning or repainting, although most leave it in place year-round due to its durable nature.
Special Offer
WELCOME5 – Get 5% off storewide at allboatsupplies.com
And upto 10% additional off on all lower units
-
Yamaha Aftermarket Lower Unit Replaces 75-100HP (2 & 4 Stroke) – 2.0/2.3 Gear Ratios, 18 Spline, 20/25″ Shafts – SEI-90-404
-
Yamaha Aftermarket Lower Unit Replaces 115-130HP 4-Stroke – Fits 20/25″ Shafts – SEI-90-405
-
Yamaha 90° Aftermarket Lower Unit Replaces 150-200HP (2 & 4 Stroke) – Fits 20/25″ Shafts – SEI-90-416
-
Yamaha 150–200HP Lower Unit 4-Stroke – 20/25″ Shaft – F150/F175/F200 Series (2004–2024) – New/Remanufactured – YA-G4-06
Conclusion
A Yamaha lower unit skeg guard installation is a smart, budget-friendly solution to protect your boat’s propulsion system. With minimal tools and time, you can add a layer of defense that prevents future damage, improves handling, and saves on repairs. Whether you’re restoring a damaged skeg or planning ahead, this DIY upgrade is one of the best investments for Yamaha outboard owners. For high-quality, Yamaha-compatible skeg guards and lower units, check out the wide range at AllBoatSupplies.com.
Read More
For more helpful marine maintenance guides, check out our article on DIY Pressure Testing Yamaha Lower Units � Safe & Simple.


