Yamaha Lower Unit Water Pump Kit Replacement (DIY Guide)
Introduction
Keeping your outboard motor running smoothly relies heavily on a properly functioning water pump. One of the most critical tasks boat owners face is timely Yamaha lower unit water pump kit replacement. Whether you’re a seasoned boater or a DIY enthusiast looking to avoid dealership service costs, this guide walks you through every step of replacing your Yamaha water pump kit efficiently and correctly.
In this detailed tutorial, you’ll learn the exact tools needed, common troubleshooting signs, and expert-level tips to ensure your Yamaha outboard’s cooling system functions at its best. By the end, you’ll be equipped with everything you need to handle your own Yamaha lower unit water pump kit replacement like a pro.
Overview / What Is Yamaha Lower Unit Water Pump Kit Replacement
The water pump in your Yamaha lower unit plays a critical role in the engine’s cooling process by circulating water through the powerhead and lower unit. Over time, the impeller and gaskets wear out due to friction, heat, and debris. A Yamaha lower unit water pump kit includes the impeller, gaskets, wear plate, and housing – all essential components for a complete and effective replacement.
This maintenance task is usually performed once a season or after every 100 hours of engine use. Ignoring water pump wear can lead to engine overheating and costly damage. That’s why learning how to do a Yamaha lower unit water pump kit replacement is vital for extending the life of your outboard motor.
Tools and Materials Needed for DIY Water Pump Kit Installation
Before diving into the process, make sure you have all the required tools and parts on hand. Having a well-prepared workspace is key to a smooth replacement experience.
- Yamaha OEM or aftermarket water pump kit (includes impeller, gaskets, wear plate, key, etc.)
- Socket wrench set (metric)
- Flat-head and Phillips screwdrivers
- Marine-grade grease
- Torque wrench (for reassembly)
- Drain pan
- Outboard stand or jack
Tip: Always refer to your Yamaha model’s service manual for torque specifications and part number compatibility.
Step-by-Step Guide to Yamaha Lower Unit Water Pump Kit Replacement
Follow these detailed steps to successfully perform a DIY Yamaha lower unit water pump kit replacement:
Step 1: Drain the Lower Unit Gear Oil
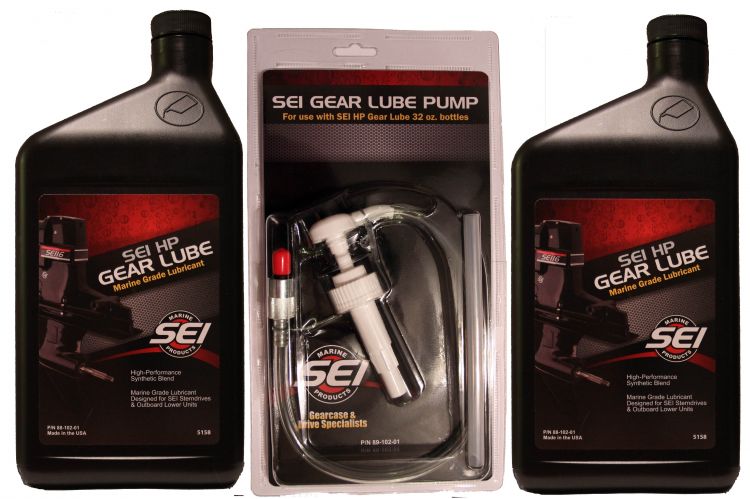
Start by placing a drain pan underneath the lower unit. Remove the top vent screw first, then the bottom drain screw. Allow all oil to drain completely. This step prevents mess during disassembly and helps detect water intrusion in the oil.
Step 2: Remove the Lower Unit
Using your socket wrench, unbolt the lower unit from the midsection of the outboard. Be careful with shift linkage, especially on older Yamaha models. Mark bolt positions to simplify reassembly.
Step 3: Disassemble the Water Pump Housing
Once the lower unit is off, locate the water pump housing on top of the gearcase. Remove the housing bolts and lift it off. You’ll see the impeller seated on the drive shaft.
Step 4: Inspect and Replace Impeller & Gaskets
Take note of the impeller’s vane direction. Remove the impeller, key, and wear plate. Clean the surface and install new gaskets and wear plate. Slide the new impeller onto the drive shaft, aligning the key properly. Apply marine grease to ease installation.
Step 5: Reassemble the Water Pump Housing
Reinstall the pump housing with new gaskets. Tighten the bolts to spec using a torque wrench. Make sure everything is aligned perfectly to avoid leaks or reduced water flow.
Step 6: Reinstall the Lower Unit
Carefully raise the lower unit and align the drive shaft, shift rod, and water tube. Tighten all bolts evenly. Refill with fresh gear oil and replace the vent and drain screws securely.
Common Problems When Replacing Yamaha Water Pump Kit
Even experienced DIYers can run into issues. Here are a few troubleshooting tips:
- Shift linkage misalignment: Make sure the shift rod is in the same gear position when reinstalling.
- Impeller blades installed backwards: Rotate the impeller in the correct direction while installing to prevent damage.
- Leaky water pump housing: Always replace all gaskets and use marine-grade sealant when recommended.
If you’re facing unusual overheating after installation, double-check the water tube alignment and impeller key placement.
Maintenance Tips
To avoid frequent replacements and maintain peak cooling efficiency, follow these water pump maintenance tips:
- Flush your engine with fresh water after every use, especially in saltwater.
- Inspect the water stream (telltale) regularly. A weak or absent stream is a sign of impeller wear.
- Change the impeller every 1–2 years regardless of hours if you’re in sandy or debris-filled water bodies.
- Keep a spare Yamaha lower unit water pump kit onboard for emergencies.
Following these steps can dramatically extend the lifespan of your Yamaha water pump and ensure optimal performance.
Expert Advice and Pro Recommendations
Experts suggest always choosing OEM Yamaha water pump kits when possible, especially for newer engines. However, many quality aftermarket options exist that offer excellent durability and value. Brands like SEI Marine and Sierra offer reliable alternatives.
Here are a few expert tips to remember:
- Use a soft mallet to remove stuck impellers without damaging the shaft.
- Apply anti-seize compound to bolts for easier future maintenance.
- Label all parts and bolts during disassembly to avoid confusion.
Detailed FAQ Section
How often should I replace my Yamaha lower unit water pump kit?
Most marine mechanics recommend replacing the water pump impeller every 100 hours or at least once per boating season. However, if you’re operating in sandy, silty, or saltwater environments, you may need to replace the pump more frequently. Annual inspection is essential to catch wear signs early. Neglecting it can result in overheating and catastrophic engine damage.
Can I use aftermarket parts instead of OEM Yamaha kits?
Yes, you can. Reputable aftermarket brands like SEI Marine, Sierra, and GLM produce high-quality water pump kits that often match or exceed OEM specifications. However, ensure compatibility with your exact engine model and shaft size. While OEM parts offer guaranteed fit and performance, aftermarket kits are a cost-effective solution for older or secondary engines.
What are signs my Yamaha water pump is failing?
Some common signs include a weak or no water stream from the telltale, engine overheating, unusual noises, and steam from the exhaust. If the impeller becomes brittle or breaks apart, it can clog the cooling system, leading to extensive repairs. Replacing the water pump kit immediately upon noticing these symptoms can save you from major engine issues.
Can a beginner replace a Yamaha lower unit water pump kit?
Yes, this task is entirely feasible for beginners with basic mechanical skills. With the right tools, a manual, and patience, many first-time boaters have successfully completed their own Yamaha lower unit water pump kit replacement. Just make sure to follow torque specs, take pictures during disassembly, and don’t rush the reassembly process.
How much does a Yamaha lower unit water pump kit cost?
OEM Yamaha water pump kits typically range between $50 and $120 depending on the engine size and model. Aftermarket kits can start as low as $30. Labor costs for professional installation usually range from $150 to $300, depending on your location and mechanic. DIY replacement offers substantial savings and gives you better knowledge of your engine’s internals.
Special Offer
WELCOME5 – Get 5% off storewide at allboatsupplies.com
And upto 10% additional off on all lower units
-
Yamaha Aftermarket Lower Unit Replaces 75-100HP (2 & 4 Stroke) – 2.0/2.3 Gear Ratios, 18 Spline, 20/25″ Shafts – SEI-90-404
-
Yamaha Aftermarket Lower Unit Replaces 115-130HP 4-Stroke – Fits 20/25″ Shafts – SEI-90-405
-
Yamaha 90° Aftermarket Lower Unit Replaces 150-200HP (2 & 4 Stroke) – Fits 20/25″ Shafts – SEI-90-416
-
Yamaha 150–200HP Lower Unit 4-Stroke – 20/25″ Shaft – F150/F175/F200 Series (2004–2024) – New/Remanufactured – YA-G4-06
Conclusion
A successful Yamaha lower unit water pump kit replacement doesn’t require years of marine mechanic experience. With the right guidance, tools, and attention to detail, any boat owner can carry out this essential task. Regular replacement ensures your engine remains cool and dependable on the water.
Bookmark this guide and refer back each boating season. Whether you’re performing your first DIY maintenance or a seasoned Yamaha outboard owner, this step-by-step process will help you avoid costly repairs and maximize performance. For top-tier kits and OEM-quality parts, don’t forget to check out allboatsupplies.com.
Read More
For more helpful marine maintenance guides, check out our article on Yamaha Lower Unit Vibration at High Speed � How to Fix It.


